Cut. Weld. Sleep. Part #1
Hello,
As you remember (or not) in earlier topic I did show you few engine pics and bodykit teaser. You probably have noticed that in these pics shell's almost plain as car's disassembled now. After inspection it's time to take actions and get body to mint condition as there are some issues which interfere with word "mint".
After dismantlement started from removing isolation. Quite dirty and boring job...


The next was to remove all unnecessary brackets: rear seat, front seat, etc.


Drivers side sideskirt cut out and new sheet welded in as it had impact from rust.


Covered all OEM holes in floorpans as it's very good place for rust to appear. Also added some stitches to make more robust.
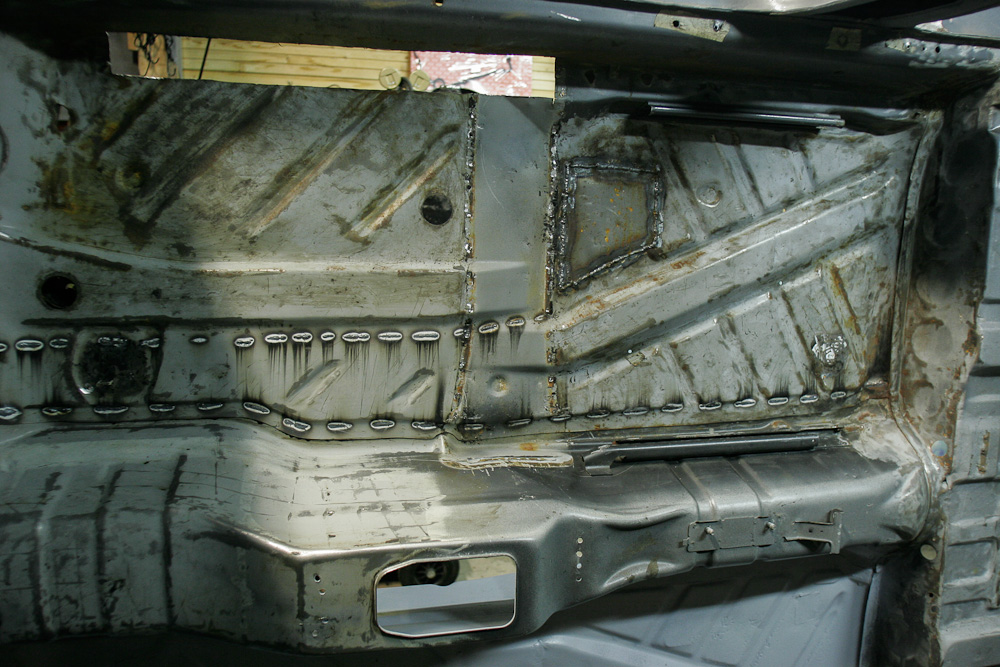
Drivers side floorpan is primed and stitched


OEM brackets holding gear shift mechanism are drilled off.

The view from underneath. You can see stitches added and floor primed with epoxy primer. All sealant and antigravel layer were removed completely.


Further I got my hands on passengers sideskirt. This needed to cut out too as had damage earlier and was a sack of rust as consequence.

Opened it to check what's awaiting inside

And finally sideskirt is removed. The condition's good, only outer part was rusted. Deeper it remained quite well.


Now let's move back to driver's sideskirt. A new one is welded in. Spacing between doors and sideskirt itself adjusted.


Some weld just to keep it in place. Later will remove door to finish welding.


And at last few pics from different angles to represent where I'm at for the moment.


And.. Rear part waiting for it's turn. Huh...

That's the end of first "Cut. Weld. Sleep" part. Still plenty of things to do ahead. And blog entries also..
Hits: 16496